
Setting up a VPN Connection
1. Access the Network & Internet settings
- Click on the Start button in the bottom left corner of your screen.
- Select the gear icon to open the Settings app.
- Click on Network & Internet.
2. Add a VPN connection
- Click on VPN from the left-hand menu.
- Click on Add a VPN connection.
3. Configure the VPN connection
- Choose a VPN provider from the drop-down list: Windows (built-in)
- Enter a name for your VPN connection in the Connection name field: bilkent-sstp
- Enter the server name or address: vpn-ng.bilkent.edu.tr
- Enter the VPN type: Secure Socket Tunneling Protocol (SSTP)
- Enter the type of sign-in info: User name and password
- Enter the Bilkent VPN username and password that you created
- Click Save to save your VPN connection.
To see full size of the image click on the thumbnail.
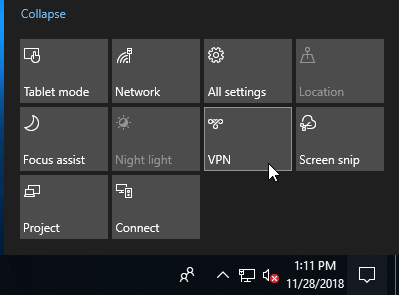 |
Click on the “Notifications” icon on the tray (lower right corner of your screen and choose “Open Action Center”. Click “VPN” on the action center menu. |
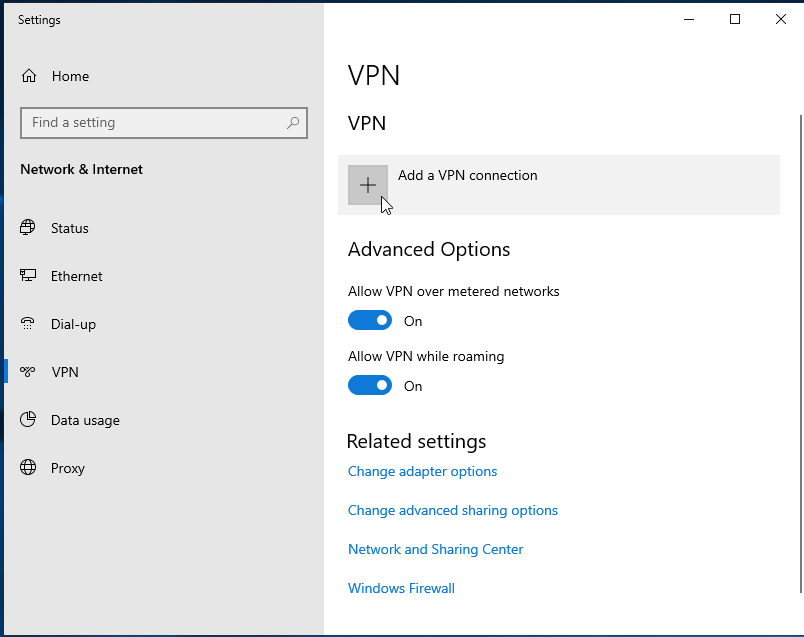 |
Click “Add a VPN Connection” |
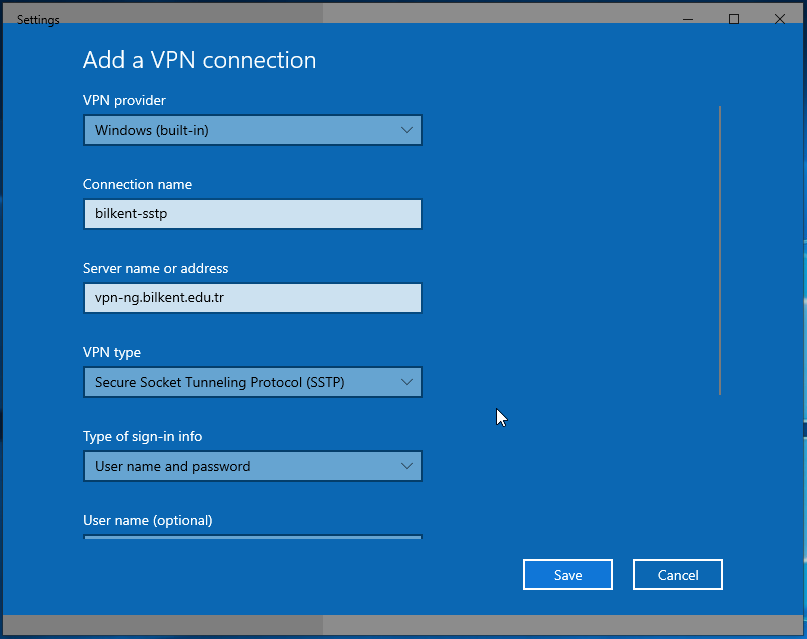 |
Fill in the boxes as shown in the screen captures. Note that you might have to scroll down to see and fill all boxes. |
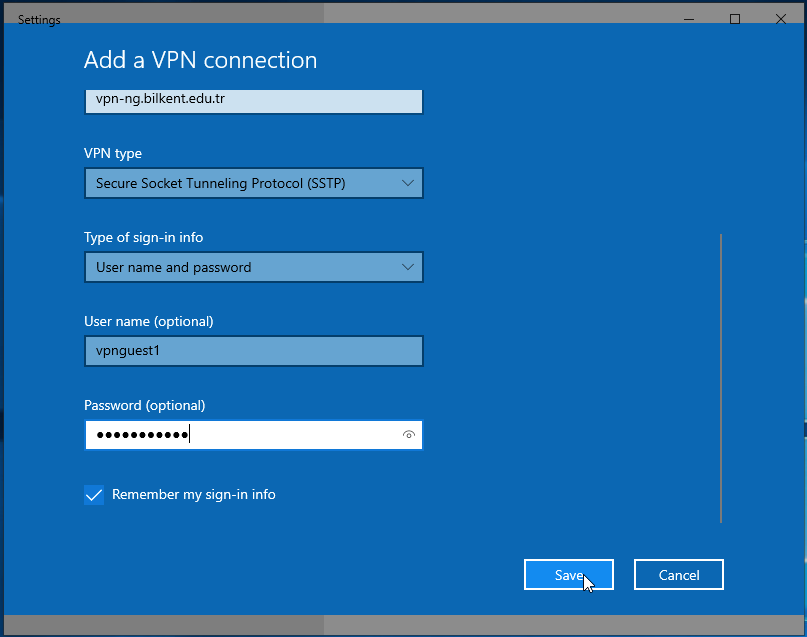 |
scrolled down… |
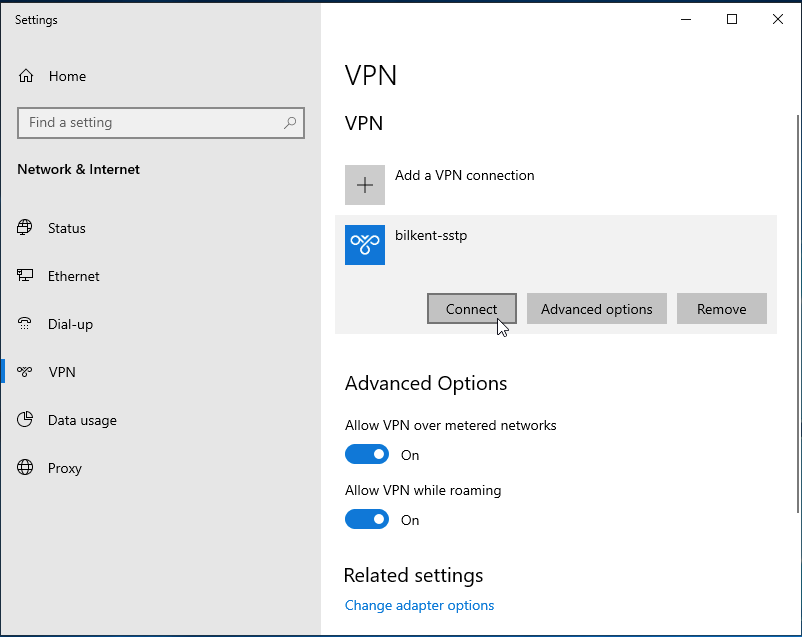 |
Click on the name of the connection you just created and hit “Connect”. |
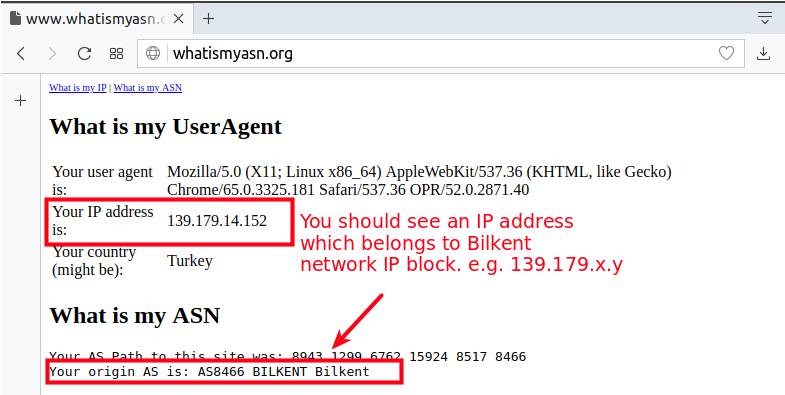 |
Visit http://whatismyasn.org and make sure that you are connected to the VPN server. |