
SSTP (Secure Socket Tunneling Protocol) is the easiest way to setup a VPN connection. Windows 7, 8 and Vista support this protocol natively. The point-to-point communication between the client computer and the VPN server is encrypted using SSL (Secure Socket Layer) just like the https: traffic on the web.
SSTP VPN Setup on Windows-7
To see full size of the image click on the thumbnail.
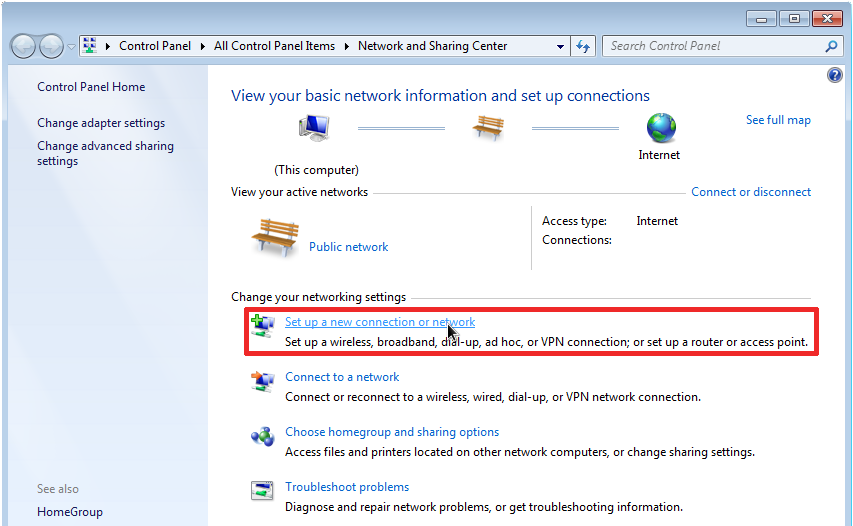 |
Go to “Network and Sharing Center” on the Control Panel and click “Setup a new connection or network”. |
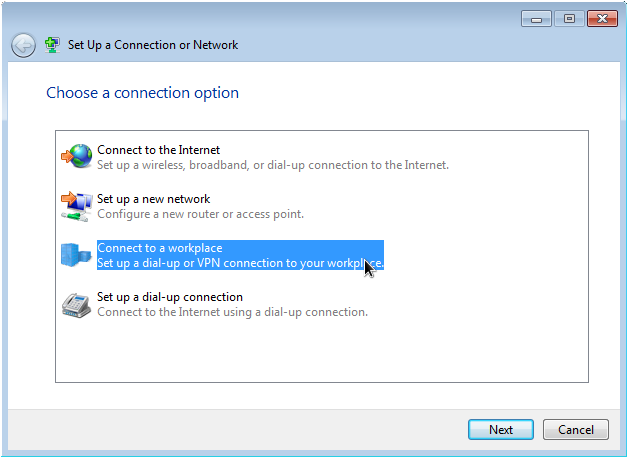 |
Click “Connect to a workplace” |
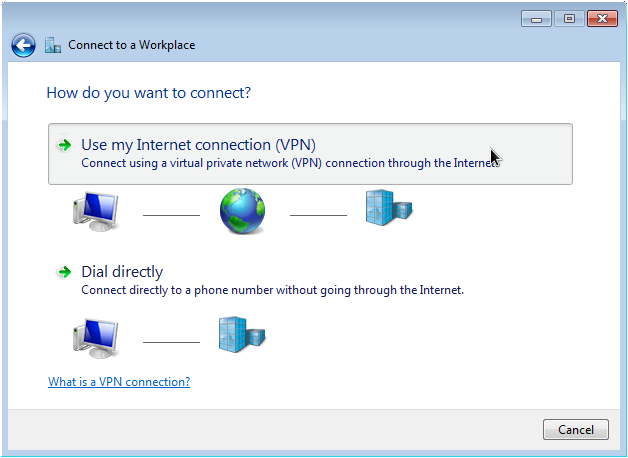 |
Click “Use my Internet connection (VPN)” |
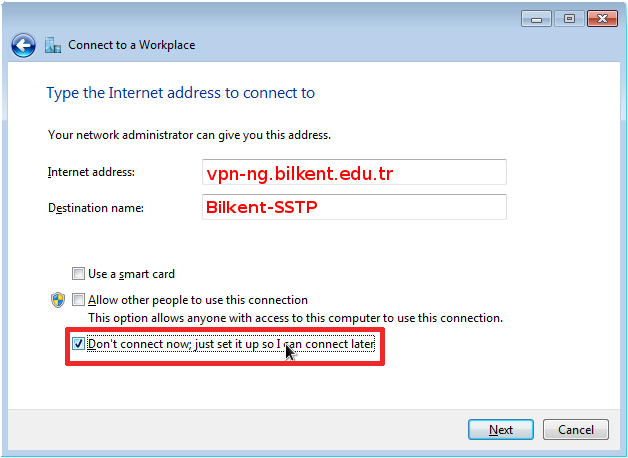 |
Enter the name of the server (vpn-ng.bilkent.edu.tr) and enter the name for the connection (Bilkent-SSTP).
Check “Don’t connect now” |
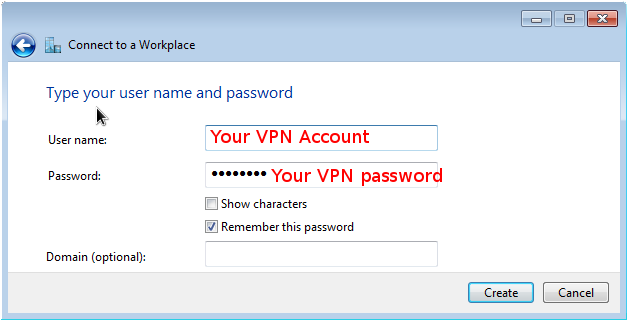 |
Fill in your VPN account name and its password |
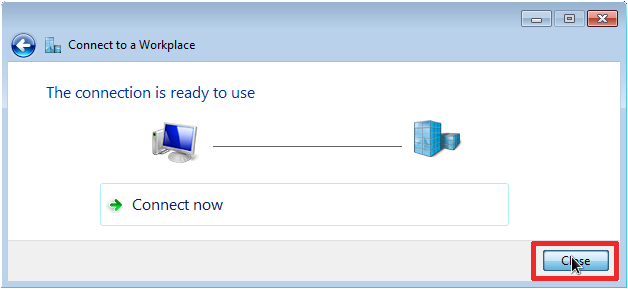 |
DO NOT click “Connect now”. Close the window instead. |
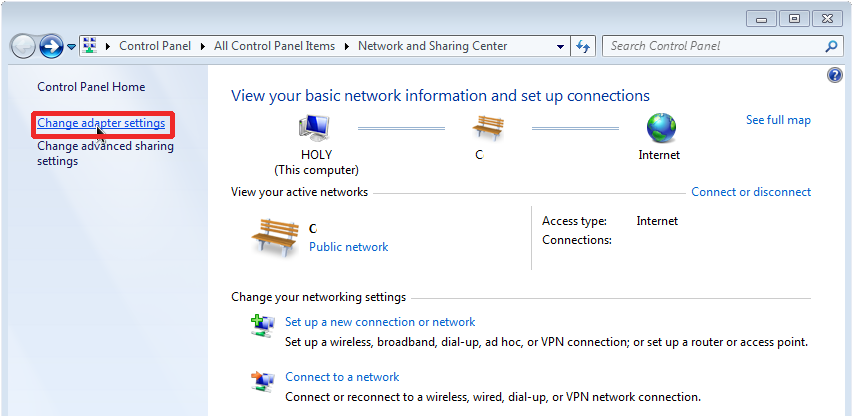 |
Click “Change Adapter Settings” on the menu left. |
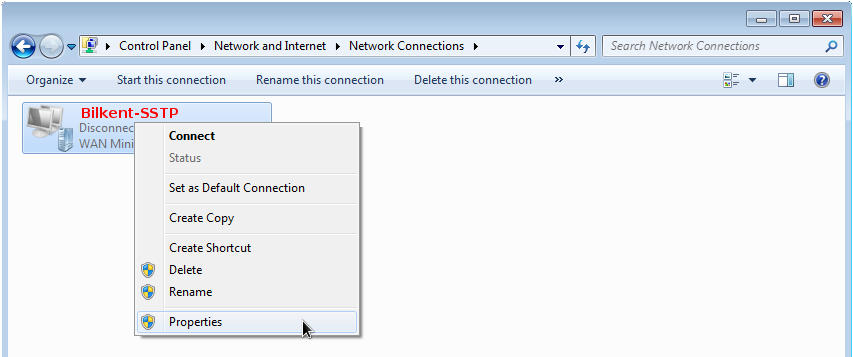 |
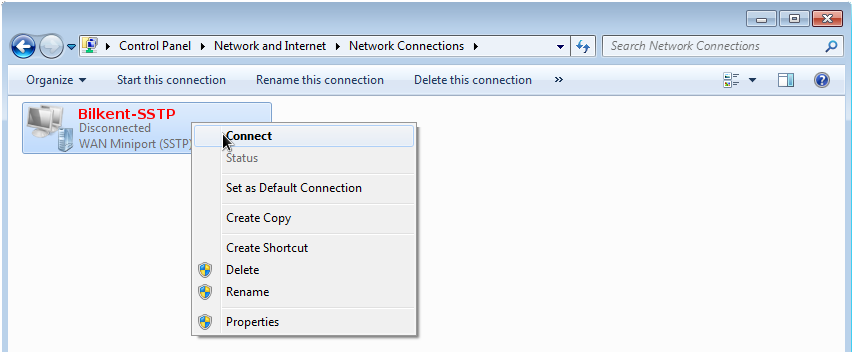
Right click on your “Bilkent-SSTP” connection and choose “Properties” |
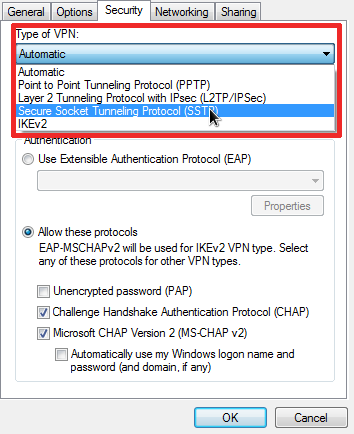 |
In the “Security” tab, change VPN type to “Secure Socket Tunneling Protocol (SSTP)”. |
 |
In the “Networking” tab, disable “Internet Protocol Version 6” and “File and Printer Sharing for Microsoft Networks” |
 |
Now you can establish a SSTP VPN connection |
SSTP VPN Setup on Windows 8 and Vista
Please refer to the support documents of your version of Windows and find out how a new VPN connection can be created.
Once you start creating a new VPN connection, the parameters you should be entering are:
| VPN Provider | Windows (Built-in) |
| VPN Server | vpn-ng.bilkent.edu.tr |
| Connection Name | Bilkent-SSTP |
| VPN Type | Secure Socket Tunneling Protocol (SSTP) |
| Type of sign-in info | User name and password |
| User name | Your VPN account’s name ( student or staff ID #) |
| Password | Your VPN account’s password (not your SRS or AIRS password) |